
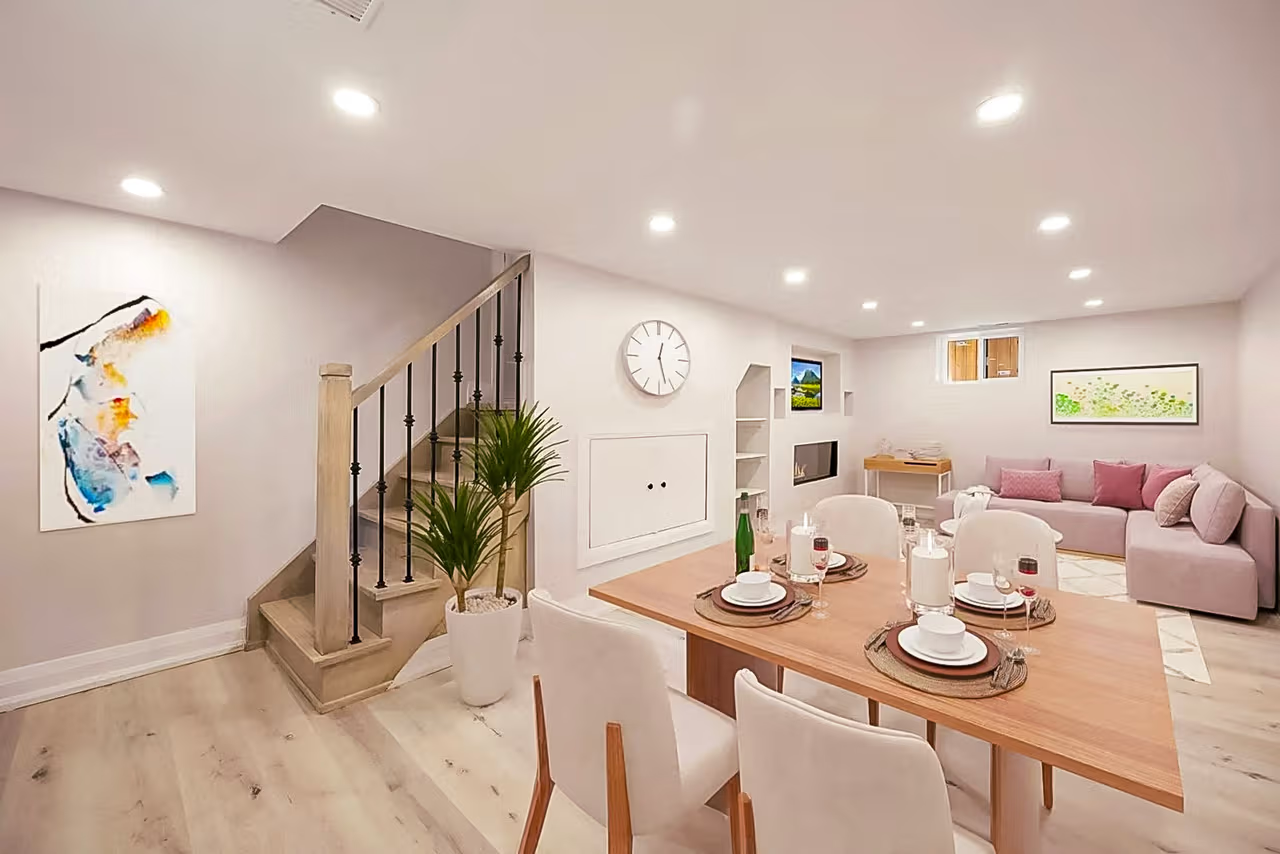

A dark, drafty basement filled with dusty storage bins and forgotten holiday decorations represents one of the largest untapped assets in modern residential real estate. For many homeowners, acquiring more usable square footage feels like a choice between moving to a larger house or building an expensive ground-level addition that eats away at yard space.
Finishing or remodeling a basement circumvents both hurdles. By capitalizing on an existing foundation, exterior framing, and subfloor system, you can effectively expand your daily living footprint at a fraction of the cost per square foot required for new above-ground construction.
Converting below-grade real estate into an inviting environment requires far more than nailing drywall to concrete walls and rolling out an area rug. Below-grade spaces present unique physical challenges, including hydrostatic pressure, soil moisture, limited natural illumination, and strict residential building codes. Addressing these challenges systematically transforms an underutilized concrete box into a warm, healthy, and versatile expansion of your home.
Assessing Structural Health and Moisture Control
Before sketching floor plans or buying lumber, you must thoroughly evaluate what lies behind and beneath the raw surfaces of your basement. Moisture is the primary adversary of any subterranean remodeling project. Concrete is porous, acting like a giant sponge that draws water vapor and dampness out of the surrounding earth.
-
Check for moisture penetration: Tape two-foot by two-foot sheets of heavy clear plastic wrap to various spots across the concrete slab floor and masonry walls. Leave them sealed with duct tape for forty-eight hours. If condensation collects beneath the plastic, moisture is migrating straight through the concrete from the exterior soil.
-
Examine foundation integrity: Walk the perimeter to inspect foundation walls for cracks, bulging, or efflorescence, which appears as a white, powdery mineral deposit left behind as evaporating water seeps through concrete. Small hairline cracks can be filled with hydraulic cement or epoxy injection systems, but wide stair-step cracks in block walls or bowing poured concrete require professional structural engineering review.
-
Address exterior drainage: Most basement moisture problems originate outside the house. Ensure soil grades slope away from foundation footings by at least six inches over the first ten feet. Clean gutters, replace broken splash blocks, and run downspout extensions at least eight to ten feet away from exterior basement walls to stop water pooling against the foundation.
-
Install water management hardware: If your home has a history of high water tables or minor flooding, install an interior perimeter drain tile system along with a heavy-duty sump pump equipped with a reliable battery backup.
Navigating Building Codes, Egress, and Permits
A finished basement must comply with regional residential building codes to ensure life safety and preserve appraisal value. Skipping permits can invalidate insurance coverage in the event of an electrical fire or flood, and it frequently halts future property transactions when home inspectors flag unpermitted living spaces.
Ceiling height is one of the most common regulatory hurdles. Most municipal codes require a finished ceiling height of at least seven feet across habitable areas. While limited exceptions are often granted for beams, ductwork, and structural pipes, these obstacles still typically require a minimum clearance of six feet, four inches to six feet, six inches.
If your renovation design incorporates a dedicated bedroom, an office, or any enclosed sleeping quarters, building regulations strictly mandate an egress window or an exterior walk-out door. An egress window allows safe emergency evacuation during a fire. It must have a minimum net clear opening of 5.7 square feet, a minimum clear opening height of twenty-four inches, a minimum clear opening width of twenty inches, and a sill height no higher than forty-four inches off the finished floor. If the egress window sits below the outdoor ground grade, you must also excavate and install an approved window well with an integrated escape ladder.
Framing, Thermal Insulation, and Acoustic Planning
Framing below grade requires strategies that differ significantly from upper-level carpentry. Concrete conducts outdoor soil temperatures, which creates cold interior wall surfaces. When warm, humid indoor air strikes cold concrete, hidden condensation forms, creating prime conditions for mold growth behind drywall.
-
Framing standoff: Never place wooden stud walls directly against bare concrete foundation walls. Always leave a gap of one to two inches between the back of the timber studs and the masonry to prevent direct moisture transfer and allow airflow.
-
Rigid foam or spray foam insulation: Apply continuous extruded polystyrene foam boards or closed-cell spray foam directly against concrete masonry before erecting stud walls. This serves as an unbroken thermal break and acts as a semi-permeable vapor barrier that stops condensation without absorbing moisture.
-
Treated bottom plates: Fasten pressure-treated dimensional lumber to the concrete slab for bottom plates using concrete anchors or powder-actuated fasteners. Untreated framing lumber absorbs dampness from concrete, leading to dry rot over time.
-
Acoustic management: Basements sit directly beneath the high-traffic zones of the first floor. Running plumbing pipes, creaking floorboards, and overhead foot traffic can disrupt lower-level peace. Fill ceiling joist cavities with dense mineral wool batt insulation, and mount ceiling drywall to resilient sound isolation channels to dramatically dampen airborne and impact sounds.
Concealing Mechanicals Without Sacrificing Utility
Basement ceilings and utility corners are typically cluttered with heating ducts, plumbing drains, gas lines, and electrical conduits. Designing around these functional utilities requires strategic planning.
Avoid building a monolithic, completely inaccessible drywall ceiling over critical mechanical runs. If a main drain line develops a clog or an overhead water shutoff valve needs emergency adjustment, tearing open finished drywall creates costly repairs. Consider grouping mechanical components into neat, dropped soffits wrapped in drywall, and incorporate magnetic access panels beneath key plumbing cleanouts, water valves, and electrical junction boxes.
Furnaces, water heaters, water softeners, and electrical breaker panels must remain accessible. Build dedicated utility closets with louvered doors to supply adequate combustion air to fuel-burning equipment. Maintain clear clearances of at least thirty inches in front of electrical service panels to comply with national electric code standards.
Selecting Durable Flooring Solutions
Concrete basement slabs expand, contract, and exude slight vapor fluctuations throughout changing seasons. As a result, solid hardwood flooring is unsuitable for below-grade applications because variations in humidity cause natural wood planks to cup, warp, and buckle.
-
Luxury vinyl plank: Rigid-core luxury vinyl plank flooring is among the most practical and popular options for finished basements. It is entirely waterproof, resists mold, handles uneven concrete floors well, and clicks together easily over an approved underlayment.
-
Engineered hardwood: If you prefer the look of real timber, engineered hardwood consists of a genuine wood veneer bonded over cross-laminated plywood layers. This layered structure resists moisture-induced dimensional movement better than solid timber. Always install engineered wood floating over a sealed moisture-barrier subfloor system.
-
Ceramic or porcelain tile: Tile provides a durable, waterproof surface that will not degrade even in the event of minor water leaks. However, tile feels cold and hard underfoot, which can be mitigated by embedding electric radiant heating cables into the thinset mortar beneath the tile.
-
Modular carpet tiles: Wall-to-wall rolled carpeting with thick padding can trap moisture and harbor mildew in humid subterranean air. Modular carpet tiles backed with waterproof synthetic layers offer a softer, warmer floor that allows individual squares to be lifted, washed, or replaced if a spill or leak occurs.
Lighting, Layout, and Maximizing Perceived Space
Because underground rooms receive minimal natural illumination, poor lighting quickly makes a renovated basement feel like an uninviting cavern. A well-designed illumination plan uses multiple distinct layers.
Recessed LED wafer lights mounted flush into ceilings offer excellent ambient brightness without encroaching on overhead clearance. Pair these with accent sconces, under-cabinet lighting in bar areas, and warm floor lamps to create a welcoming, residential atmosphere. Use light fixtures rated at 2700K to 3000K to generate a warm, natural glow that mimics late afternoon sunlight.
To visually expand the space, maintain open-concept layouts wherever structural support posts allow. Use light, warm neutral wall paint tones like cream, soft greige, or pale canvas to reflect light throughout central corridors. If you must incorporate support posts, wrap them in clean millwork, integrate them into half-wall room dividers, or incorporate them into an open wet bar island rather than leaving bare steel lally columns exposed.
Frequently Asked Questions
How long does an average full basement renovation take to complete?
A comprehensive basement finishing project typically takes between eight and fourteen weeks once construction begins. The timeline depends on project scope, permitting approvals, whether new underground plumbing lines must be trenched into concrete, and the complexity of custom finishes like kitchenettes or bathrooms.
Can I install a full bathroom in my basement if there are no pre-plumbed drains?
Yes. Installing a bathroom without pre-existing rough-in plumbing requires cutting and jackhammering trenches into the concrete slab to tie new waste lines into your main sewer drain using gravity. If your home main sewer outflow pipe exits through the wall above the level of the basement floor, an upflushing sewage ejector pump system or macerating toilet must be installed to lift waste up to the exit pipe.
Does finishing a basement count toward the official square footage of my home?
In most regional real estate markets across North America, finished below-grade spaces are not included in the official above-ground gross living area calculation on property listings. However, appraisers and real estate professionals list finished basements separately as finished below-grade living area, which still adds substantial overall market value to the property.
What is the best way to heat and cool a finished basement?
Basements generally retain cool temperatures year-round due to the insulating properties of surrounding earth, but they struggle with cold winter floors and summer humidity. Adding extra supply and return duct runs off your existing central forced-air HVAC system works well if the unit has adequate heating capacity. Alternatively, installing a ductless mini-split heat pump provides quiet, independent zone temperature control and effective dehumidification without modifying your primary furnace.
What is the minimum slope required for cutting plumbing drains in concrete slabs?
Standard gravity plumbing lines cut into a basement concrete floor require a minimum continuous downward slope of one-quarter inch per linear foot for pipes with diameters of two inches or smaller, and one-eighth to one-quarter inch per foot for pipes measuring three inches or wider. Maintaining proper slope ensures solids and liquids move cleanly toward the sewer connection without clogging.
Is an interior French drain system required before finishing every basement?
An interior French drain is not strictly mandatory for every home, especially if the foundation has a proven history of remaining completely dry through torrential multi-day storms. However, if your home sits in an area with a high water table, heavy clay soil, or recurrent seasonal seepage, installing an interior drain system and sump pump beforehand provides necessary insurance to protect your new drywall, insulation, and flooring.
What type of drywall should be used on basement walls?
It is best practice to install moisture-resistant and mold-resistant drywall, often identifiable by its purple or green paper facing, or fiberglass-faced drywall throughout the entire basement. Avoid standard paper-faced drywall on subterranean exterior walls, as ordinary paper provides a cellulose food source that accelerates mold growth if moisture penetrates the wall cavity.

Comments are closed.